For those of you who don’t peruse my online scrapbooking website on a regular basis (www.TheScrapbookPeople.com), I feature “Mo’s Weekly Share” every, well…week. This week’s share is a review of the Scotch Advanced Tape Glider. I really love this product, as you will be able to see in this silly little video my daughter helped me produce. I hope you enjoy! If you don’t, I don’t wanna know.
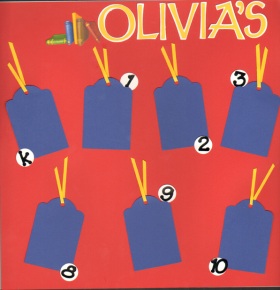
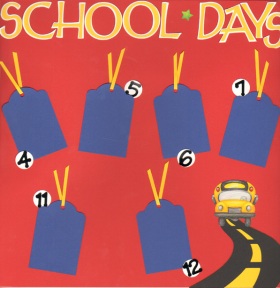
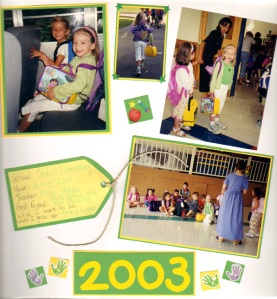
School Days – Scrapbooking Through the Years
I have two rules when I scrapbook: 1) Quick; 2) easy. Well, I am breaking one of my rules today: Rule #1. Thought I’d be up front and honest before you got started. With that being said, I really, really wanted to share this with you because I thought it was too cute! I would say, from start to finish, you can accomplish this task in about an hour, give or take (if you’re organized).
What you will need:
2 – 12”x12” pieces of red cardstock (background)
Blue cardstock (tags)
Yellow cardstock (tag ribbon & letters)
White cardstock (letter shadows & circles)
Black mini numbers
Die cut machine for title (or you can use letter stickers, whatever you prefer)
Due cut machine or punch for tags
½” circle punch
- First, you will need to make 13 tags using the blue cardstock. I used a 3” tag paper punch.
- What tag is complete without the ribbon? Using a yellow sheet of cardstock and your trimmer, cut 13 – 1/8” x 3 1/2 “ strips of paper and string them through the hole of each tag.
- Using a ½” circle punch, punch out 13 circles using white cardstock.
- Tape the tags down to your background.
- Stick number stickers on each circle to label each tag according to grade.
- For the title, I used Cricut cartridge George and Basic Shapes for the letters on yellow paper. They are 1 ½” long and the letter backgrounds was cut using the “shadow” option and white paper.
- Stick down your letters and you have your layout!
- Decorate your pages with school stickers. Easy!
Where to put the layout? Since my daughter has 4 more years of school to go through, I can’t just stick this in the middle of a random scrapbook. I’ve decided to keep it in a safe place and insert them at the end of her senior year album (don’t forget to cover the pages with protectors).
Quick shout out to Ann-Marie for yet another marvelous idea! Thank you Ann-Marie!!!
Confetti Pockets for Summer Layouts
Hi all! Back in April I showed an instructional video on how to make confetti pockets for your scrapbooks. Today I’m going to show you how to do a confetti pocket for your summer layouts! All you need for this project are the following:
- Memorabilia Pocket Size 8.5″x3″
- Cardstock – several colors of your choosing
- Paper punch
- Alphabet stickers or die cut machine
- Glue stick and/or tape runner
- Scissors/paper trimmer
For this project, I used mini fish and starfish paper punches that I borrowed at a crop I attended (Creative Memories). If you do not own either of these types of punches, using a hole punch will work just as well. Make your confetti first to get it out of the way. Choose cardstock colors that remind you of summer, I used yellow and orange. This part is a bit time-consuming because you will want to punch at least 50 shapes for your pocket.
Next, you will need at least a 8.5 x 3 inch keepsake envelope. If you don’t have one or can’t find one in a store, you can make one by using the instructions here.
Using two different pieces of colored cardstock (I used blue and green), cut out 2 backgrounds. The first background (blue) needs to be cut down small enough to fit inside the envelope. The second background (green) needs to be a bit larger because it will be adhered behind the finished pocket.
Using my Cricut machine, I cut out a sun and letters that spell out “BEACH” and adhered them to the foreground paper near the top. Next, I created waves by ripping 3-4 different shades of blue cardstock and then layered and adhered them to the bottom of the foreground paper. Trim off any excess. Then insert this piece of paper into the pocket followed by the confetti in front of it. Seal the envelope closed. Adhere the envelope to the slightly larger piece of background paper and you are done!
If you are a visual person like me, check out my video to see how it’s done:
Journaling Tips for Your Scrapbook Layouts
 As a follow-up to my “Waste Not, Want Not” blog, I wanted to show some different journaling techniques. I am a journaling NUT. Not because I love to write, but because I feel this weird need to chronicle every single thing I can possibly remember about the event I am scrapbooking at the moment.
For years, I thought the only way to do this journaling was to handwrite everything. If you look through my scrapbooks, you will see my incredibly sloppy handwriting EVERYWHERE! Smack in the middle of a page, at the bottom, squished in the top, like I said EVERYWHERE! YUCK! It’s unsightly to say the least.
Well, guess what? I discovered that handwriting your journaling is not the only way to go. Here are some ways that I now like to incorporate journaling into my scrapbooks:
- Journaling box (oldie but goodie)
- Hidden journaling
- Printer journaling
- Write around or directly on top of the photograph – major space saver
- Tags
Journaling Box – In this layout, room was made for a journaling box. This is where you journal either with your own handwriting or via printer.
“Pull Here” tab – This is categorized as “hidden journaling.” This photo is double-matted. In between the two mats I left room for a pull tab that contains journaling by only adhering 3 sides of the mat.
Another form of “hidden journaling” – here the journaling is behind the photo. The reason for this is because there wasn’t enough space on the page for journaling. For this photo, I cut out the mat to resemble a file folder. Using my paper trimmer with the scoring blade, I scored along the top edge of the mat and adhered only this piece down so that the photo can be lifted to read the journaling.
Printer Journaling – Use your printer to journal. This is so much fun because you can chose the font type, size and color. Just be sure to use acid free paper when printing.
Journal on around or directly on top of a photograph – This form of journaling is a huge time and space saver! But it’s really only good if you have only a couple of words to say. Don’t try to cram too much on or around a photo, it will just turn out looking messy.
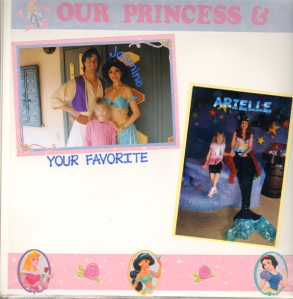
Example of journaling both on and around. Again, mini alphabets stickers were used for the journaling.
Tag Journaling – I love to use this technique when creating school layouts, but this can be used for anything! Tags can be bought at the craft store or regular cardstock can be cut to look like a tag.
My Favorite Childhood Shows – Why Can’t They Come Back?
I’m deviating from the subject of scrapbooking today because I recently read a blog post by Jenn from “The Coolest Family on the Block” that inspired me to write this. I love how witty and fun she is and especially loved the post she published about her fave shows that she’d like to see make a comeback. I had so much fun reading her blog and remembering all the shows I loved from my childhood, that I wanted to share. Here they are in no particular order. Tell me if you remember any of these or what your choices would be!
1. The Partridge Family:
This show was about a widowed mom raising her five talented children, so talented in fact, they formed a band and embarked on a successful music career. Of course, we were all googly-eyed for Keith (David Cassidy). I still turn the dial up on the radio and sing along to “I Think I Love You” whenever it is broadcast. Simple, clean fun — where are those types of shows? I don’t think they make them anymore and it’s a crying shame.
2. Captain Kangaroo:
What can I say about Captain Kangaroo? Every time I think of this dear old man, I get a warm fuzzy feeling. He was my go-to guy when I was having a bad day, well, as bad a day a 7 year-old girl can have. I loved his cast of characters as well. My favorite was Mr. Green Jeans.
3. H.R. Pufnstuf:
Jimmy, the main character is tricked into boarding a sailboat by the evil “Witchie Poo” and lost on another land called Living Island. The characters were predominantly life size puppets, from the trees to the houses. H.R. Pufnstuf, the character the show is named for, plays the lovable Mayor of the island. I loved all the trouble Jimmy had to avoid. Definite “edge of your seat” kind of fun for a 5 year old for sure!
4. School House Rock:
Schoolhouse Rock was not actually a show, but a little clip of an educational cartoon/sing along that was broadcast between shows. This was the time before commercials were run every 8 minutes. I learned about adjectives, how a bill becomes a law and multiplication by watching these film shorts. I don’t believe they show these on TV anymore but you can purchase a DVD that contain all the episodes.
5. Gilligan’s Island:
Actually in syndication when I became addicted, this tale was about a Captain, his Skipper and 5 passengers that are stranded on a desert island. Every episode is about this group of 7 trying to concoct ways to get off the island. Every time the viewer watches, we are all hopeful for a good turnout, but of course there never is one. Even with the ever thinking Professor.
6. Fat Albert:
This animated show based on a cast of characters from Bill Cosby’s childhood was the cat’s meow! Great lessons, great stories and great fun was to be had every Saturday morning watching this cartoon. I’m so sad to think that my daughter was forced to watch shows like Power Puff Girls and Rug Rats. They just don’t make quality cartoons like this anymore. In addition to Fat Albert, I loved watching Bugs Bunny, Scooby Doo and Popeye The Sailor Man.
7. Mister Rogers Neighborhood:
“It’s a wonderful day in the neighborhood, won’t you be my neighbor?” I still can remember every word to that theme song. This show was just good, quality TV — chock full of educational tidbits and so much more. I love you Mister Rogers! You will forever be in my heart!
8. Bozo The Clown:
A clown that Ronald McDonald was inspired by, Bozo the Clown was a very popular children’s show and was loved by all. I absolutely LOVED Bozo but when you look at Youtube videos of the show now, he seems kind of creepy. Still, I have such great memories of him on our little black and white.
9. Little House On The Prairie:
You just can’t get any better than “The Prairie.” A wonderful show full of good morals, family values and drama (remember Nellie?). You can still see this show in syndication. When I happen upon it, I am immediately drawn in by it’s innocence. Of course, my 13 year old thinks it’s boring. She doesn’t know what she’s missing!
10. The Waltons:
This show was something that brought my family together in front of the TV once a week. Great family values and just good old fashioned goodness. Goodnight Jim-Bob, Goodnight Mary-Ellen… Can you remember all the names of the numerous children Ma and Pa Walton had? Bet ya can’t!
Some of these shows may be caught on Nick-At-Nite or some random cable network, but it would be great if they could be made readily available for our viewing pleasure. Honestly, nothing compares to these tried and true real honest to goodness great television shows.
Waste Not, Want Not — How To Cram Those Photos Into a Layout!
Two things I am notorious for when it comes to scrapbooking: 1) Fitting as many pictures on a page as I can get away with and 2) Journaling everything! Today I am going to talk about getting those photos crammed into a layout. You’ll have to stay tuned for the journaling tips.
First, let me start off by saying that I love all those beautifully creative layouts with one or two pictures on them. In fact, I have single-picture-per-page envy because I wish I could do that. But I can’t.
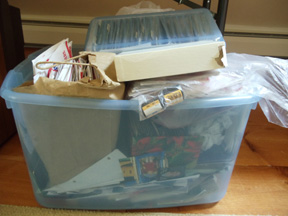
Why? For starters, it’s a waste (of time, of pages, of embellishments…) for me. But the main reason is because I have a million pictures accumulating in a clear plastic bin that need to find a permanent home — and fast!
I need to get them out of this bin ASAP and making one-picture spreads just doesn’t work for me. I know you’re out there nodding in agreement, who are in the same position I am in, right? I think what I’m getting at here is go ahead and cram ‘em in. Well, not too much. Then it just looks sloppy. But I’ve been known to put a dozen or more pictures on a 2-page spread. There are many ways you can do that. Collage, tiled, overlapping, silhouetting and clustering are some and I’m going to show you an example of each! These samples are easy and fast. Remember, the point is to get your photos out of a box and into a layout as quickly as possible.
So, what have you learned from this? Waste Not, Want Not! That’s MY motto, why shouldn’t it be YOURS?
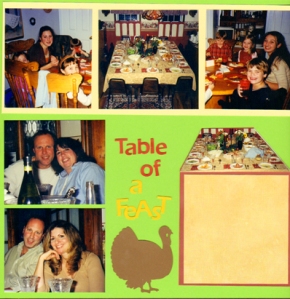
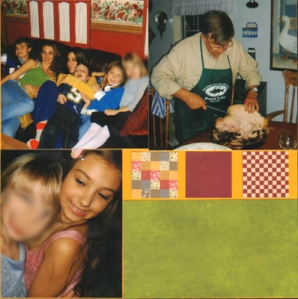
Collage Double Layout – Use several photographs and crop them to fit in close proximity of each other. Notice the open space for journaling. This use of space allows for several photos without looking crowded.
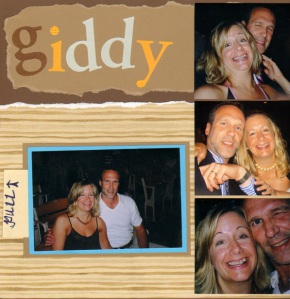
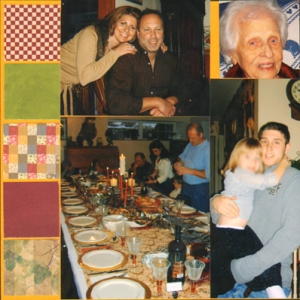
Tile #1 – These photos have been cropped to be the same size. This makes your layout look tidy.
Tile #2 – Again, these photos have been cropped to the same size, but they are anchored on one mat.
Overlapping, Silhouetting and Clustering –
Be cautious when you overlap, it can look messy if not carefully thought out. Here I have used 3 photos which allowed more room for others.
The most time-consuming of all techniques, silhouetting, is fun and allows for many photos to fit on a page. There is one rule to silhouetting – make sure you anchor your subject on the page without it looking like a half body is floating in thin air.
Clustering is a super fast, super easy and super way to accommodate a whole bunch of pictures on a layout! The example here shows photos cropped in a circle, but you can use the same technique using any shape you wish. The idea is to cluster them closely together. Why? To save space of course!
Another example of silhouetting– Just remember the rule: Anchor your subject somewhere on the page so that it doesn’t look like body parts are missing.
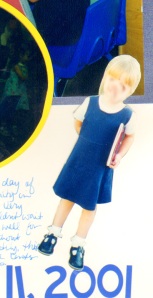
Silhouetting in the middle of the page is acceptable as long as you have the entire subject in the photo and nothing is cut off. This is when it's okay to float a silhouette.
A Review of the Scotch Advanced Tape Glider
Paper Baseballs For Your Baseball Layouts
I posted this video on Youtube over a year ago, but I figured now is the perfect time to re-visit this idea. Why? Because it’s baseball season and what better time to share again?!
You will need:
- White cardstock
- Circle cutter, circle punch or circle template
- Journal pen
I used the Fiskars 1 1/2″ circle punch and made a few circles out of white cardstock. Then, using part of one of the circles as a guide, I drew in the “stitches” with a journal pen in an arc pattern. That’s it! These cute baseballs are so easy, you can knock out a ton of them in no time flat!
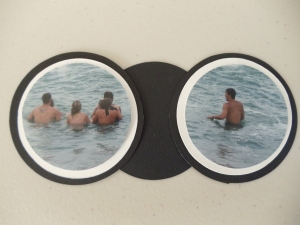
Adorable and Easy Binoculars for your Scrapbook Page
These binoculars are absolutely adorable and the simplest thing to make EVER! All you need are:
- Circle cutter, template or punch
- White Scrapbook Paper
- Black Scrapbook Paper
To get started, use black paper and cut 2 circles that measure about 2 1/2″ in diameter. Then cut 2 circles from white paper at 2 1/4″ in diameter. To connect the lenses of the binoculars, use the black paper again and either cut a 2 1/4″ circle or a square. Whatever strikes your fancy.
Adhere the white circle on top of each of the two larger black circles. Using either the extra black circle or square (whichever you decided to make), connect the two lenses.
Voila! You have your adorable and simple binoculars! Now all you need to do is decorate the lenses. Here are some ideas:
- Adhere a sticker to the white paper BEFORE you cut and then cut out the circles (for instance, an animal at the zoo – just make sure the sticker is large enough to fit inside both lenses). After you complete the binoculars, you will see half of the sticker in one lens and the other half in the other lens.
- Circle cut a photo where your subject is far away. Just be sure to make the photo a bit smaller than the white lens.
- For a birthday layout, stick down the subject’s age (40, 50, 60, etc). Put one number in each lens.
- Using mini-alphabet stickers, spell out the name of a place you went on vacation or the title of your layout.
- Be adventurous! Create larger binoculars by making larger circles.
Use your imagination and have fun with it! Note: the video states that I used 1 1/4″ and 1 1/2″ circles, they are really 2 1/4″ and 2 1/2″. Sorry!
Peek-A-Boo Titles Part II
As a follow-up to my Peek-A-Boo Titles from last week, I will show you another fun way to do Peek-A-Boo Titles. All you need is a page out of your scrapbook and a circle cutter, circle template or large circle paper punch.
Take your scrapbook page or paper and choose a spot where you would like to make your circle. In this video, I have chosen the bottom right. My circle is 3.5″ in diameter, but you can use whatever size you wish. I used a circle cutter, but if you don’t have one, a paper punch or a template will do just fine.
Place your page on top of a cutting mat and create your circle. Now, on the page before and the page after create either a title, place a photo or add some embellishments. Make sure it is in the same spot as your circle so that when you turn the page, you will be able to see your handiwork. It’s like a little window! Again, this project is fun, easy and FAST!!!
Peek-A-Boo Titles for Scrapbook Layouts
Ever have a million photographs for one event? Ever wonder how you are going to get those million photographs into your scrapbook without having to worry about titling each page? Well, here is an easy and quick way to accomplish that. I’ve been literally doing this technique for YEARS and have saved a ton of time!
Directions:
- Lay down your title (along the top, bottom or side edges of a double layout)
- Measure out the width of your title
- Take the page(s) that will be between your layout and measure and mark where you will cut it down so that the title will show through
- Trim your page with a paper trimmer
- Insert the page into the page protector
When you flip the page, you will be able to see your title through the page protector. It’s so fast and easy and is a fabulous time-saver!
