For those of you who don’t peruse my online scrapbooking website on a regular basis (www.TheScrapbookPeople.com), I feature “Mo’s Weekly Share” every, well…week. This week’s share is a review of the Scotch Advanced Tape Glider. I really love this product, as you will be able to see in this silly little video my daughter helped me produce. I hope you enjoy! If you don’t, I don’t wanna know.
Category Archives: scrapbook titles
Confetti Pockets for Summer Layouts
Hi all! Back in April I showed an instructional video on how to make confetti pockets for your scrapbooks. Today I’m going to show you how to do a confetti pocket for your summer layouts! All you need for this project are the following:
- Memorabilia Pocket Size 8.5″x3″
- Cardstock – several colors of your choosing
- Paper punch
- Alphabet stickers or die cut machine
- Glue stick and/or tape runner
- Scissors/paper trimmer
For this project, I used mini fish and starfish paper punches that I borrowed at a crop I attended (Creative Memories). If you do not own either of these types of punches, using a hole punch will work just as well. Make your confetti first to get it out of the way. Choose cardstock colors that remind you of summer, I used yellow and orange. This part is a bit time-consuming because you will want to punch at least 50 shapes for your pocket.
Next, you will need at least a 8.5 x 3 inch keepsake envelope. If you don’t have one or can’t find one in a store, you can make one by using the instructions here.
Using two different pieces of colored cardstock (I used blue and green), cut out 2 backgrounds. The first background (blue) needs to be cut down small enough to fit inside the envelope. The second background (green) needs to be a bit larger because it will be adhered behind the finished pocket.
Using my Cricut machine, I cut out a sun and letters that spell out “BEACH” and adhered them to the foreground paper near the top. Next, I created waves by ripping 3-4 different shades of blue cardstock and then layered and adhered them to the bottom of the foreground paper. Trim off any excess. Then insert this piece of paper into the pocket followed by the confetti in front of it. Seal the envelope closed. Adhere the envelope to the slightly larger piece of background paper and you are done!
If you are a visual person like me, check out my video to see how it’s done:
Journaling Tips for Your Scrapbook Layouts
 As a follow-up to my “Waste Not, Want Not” blog, I wanted to show some different journaling techniques. I am a journaling NUT. Not because I love to write, but because I feel this weird need to chronicle every single thing I can possibly remember about the event I am scrapbooking at the moment.
For years, I thought the only way to do this journaling was to handwrite everything. If you look through my scrapbooks, you will see my incredibly sloppy handwriting EVERYWHERE! Smack in the middle of a page, at the bottom, squished in the top, like I said EVERYWHERE! YUCK! It’s unsightly to say the least.
Well, guess what? I discovered that handwriting your journaling is not the only way to go. Here are some ways that I now like to incorporate journaling into my scrapbooks:
- Journaling box (oldie but goodie)
- Hidden journaling
- Printer journaling
- Write around or directly on top of the photograph – major space saver
- Tags
Journaling Box – In this layout, room was made for a journaling box. This is where you journal either with your own handwriting or via printer.
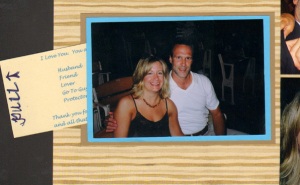
“Pull Here” tab – This is categorized as “hidden journaling.” This photo is double-matted. In between the two mats I left room for a pull tab that contains journaling by only adhering 3 sides of the mat.
Another form of “hidden journaling” – here the journaling is behind the photo. The reason for this is because there wasn’t enough space on the page for journaling. For this photo, I cut out the mat to resemble a file folder. Using my paper trimmer with the scoring blade, I scored along the top edge of the mat and adhered only this piece down so that the photo can be lifted to read the journaling.
Printer Journaling – Use your printer to journal. This is so much fun because you can chose the font type, size and color. Just be sure to use acid free paper when printing.
Journal on around or directly on top of a photograph – This form of journaling is a huge time and space saver! But it’s really only good if you have only a couple of words to say. Don’t try to cram too much on or around a photo, it will just turn out looking messy.
Example of journaling both on and around. Again, mini alphabets stickers were used for the journaling.
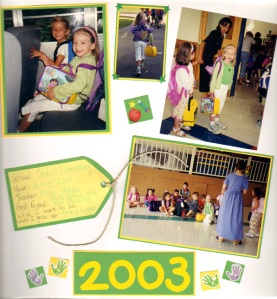
Tag Journaling – I love to use this technique when creating school layouts, but this can be used for anything! Tags can be bought at the craft store or regular cardstock can be cut to look like a tag.
A Review of the Scotch Advanced Tape Glider
Paper Baseballs For Your Baseball Layouts
I posted this video on Youtube over a year ago, but I figured now is the perfect time to re-visit this idea. Why? Because it’s baseball season and what better time to share again?!
You will need:
- White cardstock
- Circle cutter, circle punch or circle template
- Journal pen
I used the Fiskars 1 1/2″ circle punch and made a few circles out of white cardstock. Then, using part of one of the circles as a guide, I drew in the “stitches” with a journal pen in an arc pattern. That’s it! These cute baseballs are so easy, you can knock out a ton of them in no time flat!
Adorable and Easy Binoculars for your Scrapbook Page
These binoculars are absolutely adorable and the simplest thing to make EVER! All you need are:
- Circle cutter, template or punch
- White Scrapbook Paper
- Black Scrapbook Paper
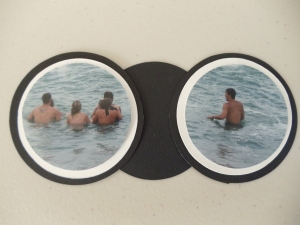
To get started, use black paper and cut 2 circles that measure about 2 1/2″ in diameter. Then cut 2 circles from white paper at 2 1/4″ in diameter. To connect the lenses of the binoculars, use the black paper again and either cut a 2 1/4″ circle or a square. Whatever strikes your fancy.
Adhere the white circle on top of each of the two larger black circles. Using either the extra black circle or square (whichever you decided to make), connect the two lenses.
Voila! You have your adorable and simple binoculars! Now all you need to do is decorate the lenses. Here are some ideas:
- Adhere a sticker to the white paper BEFORE you cut and then cut out the circles (for instance, an animal at the zoo – just make sure the sticker is large enough to fit inside both lenses). After you complete the binoculars, you will see half of the sticker in one lens and the other half in the other lens.
- Circle cut a photo where your subject is far away. Just be sure to make the photo a bit smaller than the white lens.
- For a birthday layout, stick down the subject’s age (40, 50, 60, etc). Put one number in each lens.
- Using mini-alphabet stickers, spell out the name of a place you went on vacation or the title of your layout.
- Be adventurous! Create larger binoculars by making larger circles.
Use your imagination and have fun with it! Note: the video states that I used 1 1/4″ and 1 1/2″ circles, they are really 2 1/4″ and 2 1/2″. Sorry!
Peek-A-Boo Titles Part II
As a follow-up to my Peek-A-Boo Titles from last week, I will show you another fun way to do Peek-A-Boo Titles. All you need is a page out of your scrapbook and a circle cutter, circle template or large circle paper punch.
Take your scrapbook page or paper and choose a spot where you would like to make your circle. In this video, I have chosen the bottom right. My circle is 3.5″ in diameter, but you can use whatever size you wish. I used a circle cutter, but if you don’t have one, a paper punch or a template will do just fine.
Place your page on top of a cutting mat and create your circle. Now, on the page before and the page after create either a title, place a photo or add some embellishments. Make sure it is in the same spot as your circle so that when you turn the page, you will be able to see your handiwork. It’s like a little window! Again, this project is fun, easy and FAST!!!
