Monthly Archives: March 2012
School Days – Scrapbooking Through the Years
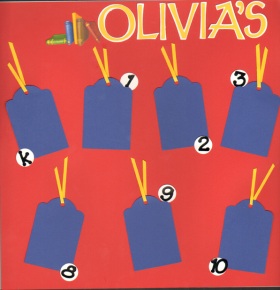
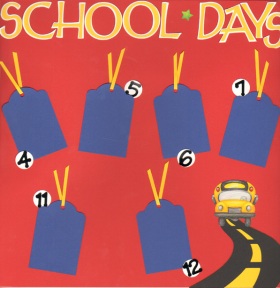
I have two rules when I scrapbook: 1) Quick; 2) easy. Well, I am breaking one of my rules today: Rule #1. Thought I’d be up front and honest before you got started. With that being said, I really, really wanted to share this with you because I thought it was too cute! I would say, from start to finish, you can accomplish this task in about an hour, give or take (if you’re organized).
What you will need:
2 – 12”x12” pieces of red cardstock (background)
Blue cardstock (tags)
Yellow cardstock (tag ribbon & letters)
White cardstock (letter shadows & circles)
Black mini numbers
Die cut machine for title (or you can use letter stickers, whatever you prefer)
Due cut machine or punch for tags
½” circle punch
- First, you will need to make 13 tags using the blue cardstock. I used a 3” tag paper punch.
- What tag is complete without the ribbon? Using a yellow sheet of cardstock and your trimmer, cut 13 – 1/8” x 3 1/2 “ strips of paper and string them through the hole of each tag.
- Using a ½” circle punch, punch out 13 circles using white cardstock.
- Tape the tags down to your background.
- Stick number stickers on each circle to label each tag according to grade.
- For the title, I used Cricut cartridge George and Basic Shapes for the letters on yellow paper. They are 1 ½” long and the letter backgrounds was cut using the “shadow” option and white paper.
- Stick down your letters and you have your layout!
- Decorate your pages with school stickers. Easy!
Where to put the layout? Since my daughter has 4 more years of school to go through, I can’t just stick this in the middle of a random scrapbook. I’ve decided to keep it in a safe place and insert them at the end of her senior year album (don’t forget to cover the pages with protectors).
Quick shout out to Ann-Marie for yet another marvelous idea! Thank you Ann-Marie!!!


